
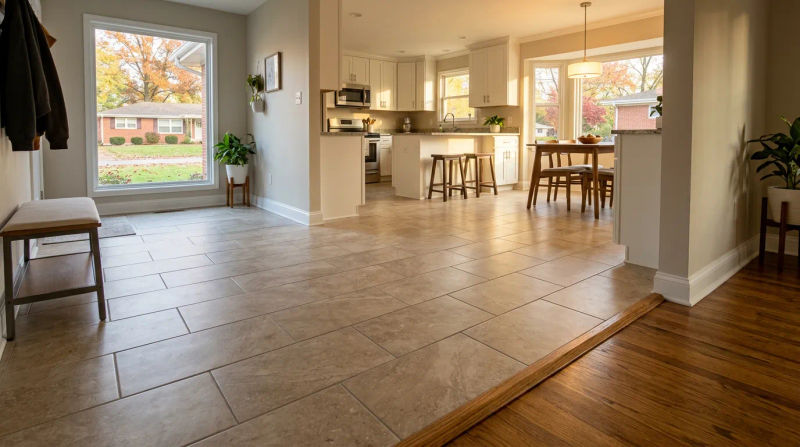
As a Senior Project Superintendent for Saving Grace Contracting, I’ve seen my share of flooring issues, especially in the beautiful, established neighborhoods of Florissant. Many of the homes here, particularly the classic 1950s brick ranches, have seen decades of life, and sometimes, that life starts to show in the home’s foundation and floors. This was exactly the case when we received a call from a family this past fall. The weather had turned cooler, heavy leaf fall was beginning to cover the yards, and they noticed something unsettling in their kitchen: the tile floor felt… soft. A few tiles had developed hairline cracks, and there was a distinct sponginess underfoot near the sink and dishwasher. With the holidays approaching, they were worried about a small problem becoming a major, hazardous failure right when family would be visiting.
They knew they couldn't just ignore it. A spongy floor is more than an inconvenience; it’s a clear signal that the structural support underneath is compromised. They needed a contractor who could not only replace the tile but diagnose and permanently fix the root cause. That’s when they reached out to us at Saving Grace Contracting.
The Assessment
When my team and I arrived at the Florissant home, the homeowners’ description was spot-on. Walking across the kitchen floor, you could feel a definite deflection in the subfloor. The grout lines around the problem area were crumbling, a tell-tale sign of excessive movement. This wasn't a simple case of a few loose tiles; this was a systemic issue that required a deeper look.
In older homes, it’s common to find layers of flooring stacked on top of each other from previous remodels. To get a clear picture, we received permission to perform some careful exploratory work. We removed a cracked tile and a small section of the underlayment. What we found confirmed my suspicions. A slow, undetected leak from a dishwasher supply line, likely happening over many months, had saturated the particle board underlayment and the top layer of the original plywood subfloor. Particle board, once wet, acts like a sponge and loses all its structural integrity. It was crumbling in our hands.
This is a classic scenario we see, and it requires a comprehensive Florissant subfloor repair under tile. Simply putting new tile over the damaged area would be a temporary, wasted fix. The new floor would fail within a year as the compromised subfloor continued to shift and deteriorate. Our assessment for the client was clear: we needed to perform a full demolition of the existing kitchen floor, remove all compromised subfloor material down to the floor joists, rebuild the structure properly, and then install a new tile floor. This was the only way to guarantee a lasting, safe, and beautiful result. The team at Saving Grace Contracting prides itself on providing permanent solutions, not just cosmetic patches.
Our Solution
With the homeowners' approval, our crew got to work. Our process is methodical, designed to be efficient while ensuring quality and minimizing disruption to the rest of the home.
First, our team established a containment zone, using plastic sheeting and dust barriers to isolate the kitchen from the adjoining living areas. Demolition can be a messy job, and protecting our clients' homes is a top priority for Saving Grace Contracting.
Our 3-person flooring crew then began the careful process of demolition. We removed the old ceramic tile, the saturated particle board, and the damaged top layer of the plywood subfloor. We cut the subfloor back until we reached solid, dry wood, ensuring we were building on a completely sound foundation. This exposed the floor joists, which we inspected to confirm they were still structurally sound and free of any moisture damage or rot - thankfully, they were in great shape.
With a clean slate, the rebuilding process began. We implemented a multi-layer system for maximum durability:
- New Subfloor: We installed ¾-inch tongue-and-groove plywood, applying a generous bead of construction adhesive to the joists before screwing the sheets down. This glue-and-screw method creates a monolithic, incredibly strong subfloor that eliminates the potential for future squeaks and movement.
- Cement Backer Board: Over the new plywood, we installed a layer of ½-inch cement backer board. This is a critical step for any tile floor replacement. It creates a stable, water-resistant substrate that won't swell or contract with changes in humidity, preventing stress on the tile and grout.
- Seamed and Mortared: We taped all the seams of the backer board with alkali-resistant fiberglass mesh tape and skim-coated them with thin-set mortar, creating a single, seamless surface for the tile.
Once the prep work was complete, it was time for the tile installation. The homeowners had selected a beautiful, modern 12x24 inch porcelain tile in a slate gray color. Our lead tile setter laid out the pattern, ensuring a balanced look with minimal small cuts. We used a high-quality, polymer-modified thin-set mortar to achieve a superior bond. Each tile was carefully back-buttered and set to ensure 100% coverage and a perfectly level surface. After a 24-hour curing period, we grouted the floor with a high-performance, stain-resistant grout in a complementary charcoal color and reinstalled the baseboards for a clean, finished look.
The Results
The transformation was stunning. The before and after tile installation Florissant difference was night and day. Where there was once a spongy, cracked, and dated floor, there was now a rock-solid, beautiful, and modern surface that completely elevated the look of the kitchen. Walking on the new floor felt incredibly solid - the deflection and sponginess were completely gone.
More importantly, the homeowners had peace of mind. They knew that Saving Grace Contracting hadn't just given them a new floor; we had rebuilt the very structure beneath it. The underlying moisture issue was resolved, and the subfloor was now stronger and more water-resistant than ever before. This wasn't just a cosmetic upgrade; it was a long-term investment in the health and safety of their home.
This entire Saving Grace Contracting flooring project case study is a perfect example of why a thorough assessment is so crucial. By identifying and correcting the root cause, we delivered a result that will last for decades. The homeowners were thrilled with the outcome and relieved to have the project completed efficiently and professionally in just four days, well before their holiday guests were scheduled to arrive.
Conclusion
A flooring project, especially one involving structural repairs, requires expertise, precision, and a commitment to doing things the right way. At Saving Grace Contracting, we don't believe in shortcuts. We believe in building things to last. From the initial inspection to the final piece of trim, our trained crews and organized workflow ensure that every project meets the highest standards of craftsmanship. That soft spot in your floor is your home’s way of telling you there’s a deeper problem. Let us help you solve it for good.
Ready for your own Saving Grace Contracting experience? Contact us today for a free inspection.